construction-site framing stage

Checklist For Post Construction Commercial Cleaning Services

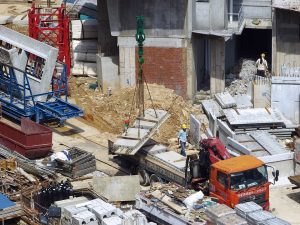
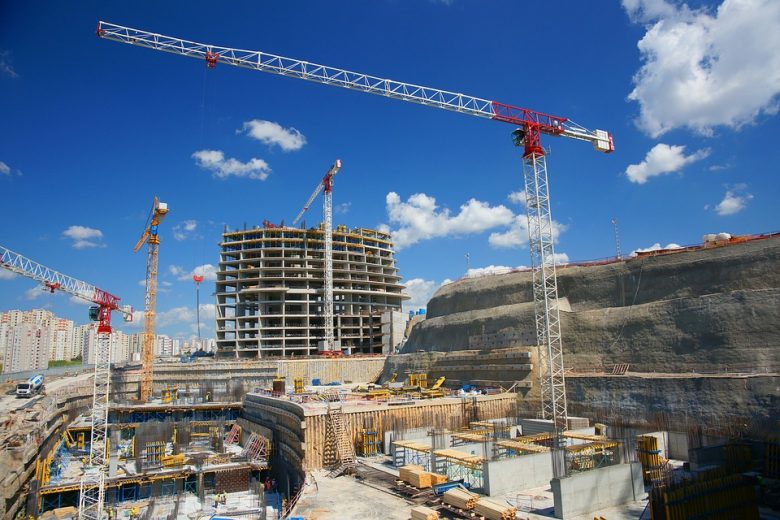
Final construction cleaning continues to become more popular as an increasing number of businesses are building out or remodelling their spaces to meet higher rents and increased demands.

One of the most effective methods for managing costs is to stay in place, but the remodelling process can be quite disruptive to a business. That’s why it’s very important to have a space ready to completely move in so that a business can run at full speed as quickly as possible, and that can partly be achieved by having final construction cleaning done.

What is Post Construction Cleaning?

In contrast to typical janitorial and commercial cleaning services that focus on weekly cleaning services so that ongoing cleanliness can be maintained, the purpose of final or ‘post’ construction cleaning is to remove all types of construction materials from a certain area. This is a one-time, short-term cleaning service this is specifically designed to meet post-construction needs.

construction cleaning crew

A janitorial provides several different tasks that are different than what a final construction cleaning service provides. The checklist below should help clear this up for you.

Checklist of Janitorial Services

  • Floor care including vacuuming, mopping and sweeping
  • Clean kitchen areas and break rooms
  • Clean and sanitize the restroom including the floors, walls, faucets, counters, sinks, urinals, and toilets
  • Maintain cleaning supplies inventory
  • Refill supplies like soaps, toilet paper, paper towels, etc.
  • Wipe down all flat surfaces to dust and clean
  • Wipe down all glass surfaces
  • Empty all recycling bins and trash cans

Checklist for Final Construction Cleaning

Final construction cleaning takes a more detailed approach to surfaces, corners, and windows with debris and heavy dusty, and there is a stronger focus on eliminating any safety concerns that the construction work has caused. This type of cleaning may include the following:

  • Address safety issues including loose wires, exposed construction, leaks, etc.
  • A detailed review of the area for any construction debris that remains
  • Remove all stickers and plastic coverings from furniture, windows, etc.
  • Remove and properly dispose of debris and trash
  • Hardwood and tile floor care
  • Frame cleaning around walkways, windows, and doors
  • Trim cleaning which includes the baseboards
  • Floor care with extra attention paid to debris and dust in the edges and corners
  • The dry or wet dusting of heater fans and vents, lights, and ceiling fixtures
  • Cleaning walls of grime, dirt, smudges, and scuff marks
  • Exterior and interior cleaning and/or power washing of all tracks, frames, and windows
  • Dusting all surfaces

Although final construction cleaning is a short term project it can take days or hours depending on the size and needs of the property.

So why is it so important to have Final Construction Cleaning done?

Average cleaning crews do not normally do this type of cleaning

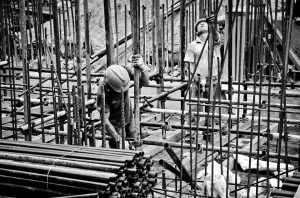
As has been shown in the above checklist, construction cleaning goes well beyond the scope of the regular maintenance cleaning process.

It helps to ensure safety

Failing to remove construction debris from the outside and inside of the property may result in issues such as lung problems from excess indoor construction dust or damage such as tires being punctured by nails left behind in the parking lot.

Professional results are delivered

clean commercial parking garageYour remodelling contractors are responsible for a certain cleanliness level, but they usually just clear the space and not typically clean it. Stickers on windows or paint spatter are very common once a remodelling job is complete, and these are the kinds of things that final construction cleaning crews look for when doing their cleaning.

Makes the space ready to move into

Before customers or employees enter your new area, it must look completely, and shouldn’t detract from any work that is being done. When post construction cleaning is performed it makes sure that all debris and dust are eliminated so that work can be picked right back up and even be better than it was before.

Cleaners with the right skills

Caulk, thick dust, adhesives, paint, and other construction materials can be left on surfaces very easily, including on floors, and the right techniques and products need to be used to clean without causing any damage. People who are trained in post-cleaning construction methods specifically have the right skills and knowledge to do the job right.

Nothing is overlooked

The cleaning crews specializing in construction cleaning are aware of what the top culprits and know where to find them. Both the exterior and interior spaces need to be cleaned thoroughly to ensure safety. Therefore it is very important that exterior walls, parking lots, and garages be power washed using a keen eye.

Cleaning through a project

Final construction cleaning may be expanded so that it also includes phase and/or rough cleaning. Typically rough cleaning is done before flooring or carpet is installed so that the sub-floor is prepared and/or after plumbing or electrical is installed so that any debris can be cleaned up before closing the walls.

Phase cleaning involves regularly planned cleaning the is done throughout the construction project to help minimize dust, debris, and dirt while work is being performed.

Whether you need maintenance support, commercial cleaning services on an ongoing basis, or temporary construction cleaning, we are here to assist your business to help you obtain and maintain the level of cleanliness that you want and need.

construction gang way used in pumping concrete

Concrete Pumping Advantages

Why Pump Concrete

How can you tell when you should use concrete pumping in your project?

What about this concrete placement method makes it a more efficient option compared to just using a wheelbarrow, bucketing using a crane, or dumping it out of a ready-mix truck?

Pumping concrete offers rewards in the future as well as now. Contractors report increased opportunities for additional projects and high customer satisfaction levels. Some of the distinct advantages that can have a positive impact on the bottom line of a project include labour and time savings, improved scheduling, increased profits, employee satisfaction, reduced site preparation, concrete placing versatility, and enhanced quality control.

Concrete Pumping Equipment

There is various equipment that can be used to pump concrete, including mortar machines, trailer-mounted concrete pumps, high-output/high-

pressure trailer, placing booms, and truck-mounted concrete pumps.

When any concrete placing equipment is used to equip a job site, consider the following factors:

Reliability
Site congestion
Site restrictions
Concrete mix design, admixtures, aggregate, and slump
The volume of concrete to be placed
Maximum height
Maximum distance
Safety
Job complexity
Job size
Job location

Increase Profits, Save Money, and Save Time

Concrete pumps are able to place concrete more accurately and faster with less labour involved than any of the other methods. A job that might take two and a half hours for five men to pour

construction example where concrete pumping is ideal

would only take one hour for three men to pump. Contractors pumping concrete on a consistent basis report 50 percent labour savings compared with truck dumping.

Concrete pumping on sit allows valuable personnel to be reallocated to other responsibilities. More ready-mix trucks also can be discharged in a shorter amount of time when a pump is used, which means more jobs can be completed in one day.

Pumping Helps To Keep The Jobs Moving

One of the most crucial aspects of concrete pouring is scheduling. On busy job sites, there isn’t any room for any downtime. Contractors who have the right equipment are able to place concrete efficiently, no matter what the job site conditions, time or day, or the weather is. Getting equipment into position and manoeuvring around the job site can be critical factors as well in determining what the best concrete placing method is for you.

Concrete pumps assist mixer dispatchers by offering unloading times that are more predictable. The pump’s steady flow also can help to increase finisher productivity from the lack of delays and interruption.

Pumps, unlike human resources, always show up on time for work and do not take lunch breaks or complain. If there is a problem, there are backup systems that can keep a pump running until the job is complete, and wear parts have been designed to replace them easily.

Site preparation on a typical pour can be unpredictable, labour-intensive, and time-consuming, which can hamper efficient scheduling.

Concrete pumping can eliminate the need to built access ramps and move them and often facilitate completing an entire job at one location while ready-mix trucks being kept at the curb safely. Pumps also help to lower excavation time from 10 percent to 15 percent and also makes back-filling an easier process.

Safety And Employee Productivity

concrete pumping truck
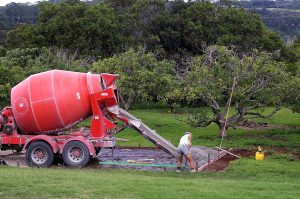
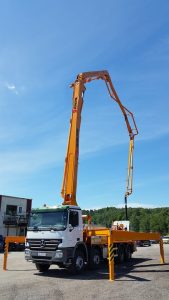
Not only does concrete pumping make a concrete pour more consistent and convenient it also helps to improve on-the-job safety. With the ready-mix trucks stay at the curb, and away from excavations, embankments, and other dangerous obstructions so that concrete may be placed precisely where you need it.

A concrete pump also reduces congestion better at the job site compared to most other methods, which improves safety and job efficiency. A more ergonomic process and fewer risks are some major benefits for on-site employees that may result in a smoother-running business and fewer sick days.

Quality Job Each Time

Team and labor savings don’t mean anything if the concrete placement quality doesn’t meet expectations. Contractors have been pumping concrete for many years and have been able to produce superior quality while also reducing expensive callbacks. Directly placing concrete without re-handling helps to improve concrete quality as well.

For optimum quality, concrete pumping also doesn’t require any special mixes. Also, concrete pumps can handle desired slumps and get rid of the need to have excess water that may result in cracking concrete.

High-Rise Efficiency

construction high rise work site

Over the past decade, the tallest buildings that have been built were pumped, including those that are over 1,900 feet high. Capacities that are greater than 150 cubic yards an hour can be achieved by pumps. Whether on a big skyscraper or at ground level, pumping concrete is a convenient and versatile way to do the job right.

Going All The Way

Boom pumps are able to navigate over obstacles and into confined spaces are able to provide results that other methods cannot do.

Also, selecting the pump concrete may also be a function of the distance that material needs to be conveyed. Mining and tunnelling are two great examples of when pumping advantages simply cannot be ignored.

workers cleaning graffiti from concrete walls

The Importance of Concrete Maintenance

The Importance of Cleaning Concrete

Concrete is among the most durable of all building materials that the construction industry uses. However, other materials can tarnish it.

Over the years I’ve been able to compile a list of some of the most common cleaning challenges that arise and solutions for them.

aged concrete wall

Beverages

Soft drink, alcoholic beverage, tea, and coffee stains usually can be removed using hot water and soap. However, if the stains persist, a bandage can be applied with 4 parts water and 1 part glycerol (glycerin). You can also add two parts isopropyl alcohol to the mixture to speed the removal action up. Bleaches for removing smoke stains can be effective well at removing other stains including coffee. On tough stains, you can use a poultice of trichloroethylene and talc.

Dirt

Airborne dirt may collect on a concrete surface and then form a dark and at times stains or oil buildup. A building that has architectural concrete might need to have air pollution deposits cleaned off in order to regain its original appearance. You can remove some dirt by scrubbing with water and detergent or around 20 parts water and 1 part hydrochloric acid. Special proprietary cleaners, however, are often preferred instead of hydrochloric acid solutions that can attract concrete.

You can use a solution of 3 parts water and 1 part phosphoric acid to scrub away moderate or light amounts of dirt with no or little corrosion. Proprietary cleaners that are made out of buffers and hydrochloric acid for protecting the concrete are used for removing serious dirt buildup. Another cleaning method is alkaline pre-wash and then followed up with an acetic acid wash. Special cleaning solutions may be designed especially for removing certain kinds of dirt.

The methods that are used for removing oil can be helpful to remove really oily dirt. Other effective methods include water blasting, light sandblasting, and steam cleaning.

After a surface is clean, it is a good idea to apply a clear-water repellent penetrating sealer (like siloxane or silane) or a breathable clear sealer (like an acrylic-based material or methacrylate) should be used for resisting the build-up of dirt and to make it easier to clean in the future. There are some cleaning specialists who prefer siloxane or silane treatments due to their high breathability (frequently with a vapor transmission of 95%).

Epoxies

You can remove most solidified epoxies from small areas to burn them off using a blowtorch. It is important to provide adequate ventilation since it will emit black acrid smoke. If there is a remaining black stain, it can be treated in the same way as smoke stains. For large areas, it is more appropriate to use abrasive blasting.

Grease

Since greasing doesn’t penetrate concrete usually scrubbing and scraping will remove it. Scrape all of the excess grease off of the surface and then scrub with detergent, trisodium phosphate or scouring powder. If the staining persists, you will need to use a method that involves solvents.

To create a stiff poultice, use a chlorinated hydrocarbon solvent like trichloroethylene or mineral spirits (naptha solvent). Apply it to the stain and leave it on until the paste has dried thoroughly. Repeat this application as frequently as needed. If necessary, scrub using proprietary cleaners that are specially formulated to remove grease from concrete, trisodium phosphate, scouring powder or strong sap. Use clear water to rinse.

For larger areas, like a whole floor, use a metasilicate, butyl cellosolve (with adequate ventilation) or another alkaline floor cleaner in order to emulsify the oil and grease on the slab surface. It will usually require brush scrubbing. Before the emulsion breaks down or the cleaning solution dries, flood rinse using water after you finish scrubbing. Other solvents that you can use to remove grease include chloroform, carbon tetrachloride, and sodium carbonate.

*Warning: Do not make a poultice using trichloroethylene since it reacts with strong alkali’s like fresh concrete or cement which results in dangerous gases being formed.

Mildew

Make a solution of 3 quarts of water, 1 quart of commercial laundry bleach, 3 ounces of trisodium phosphate, and 1 ounce of commercial laundry detergent. Apply this mixture to the area using a soft brush. Use clear water to rinse.

Moss

When exterior concrete surfaces do not have any exposure to sunlight and are in damp conditions constantly, they might have signs of moss or other plant growth. You can successfully remove those growths by applying ammonium sulfamate (which is marketed under different brand names and can be purchased at a garden supply store). You should carry out this treatment according to the package directions. If an unsightly powdery deposit remains on the surface, you can wash it off with water.

You can also use a solution of 8 parts water and 1 part sodium pentachlorophenate. Apply to the moss or other plant growth so that it is thoroughly saturated. If rain exposes the surfaced within 24 hours of the application, part of the solution will become lost and it might be necessary to do a further application. Around one week after applying the pentachlorophenate solution, it should have killed all of the vegetation growth and you can brush away any remaining residue. Usually, the surface will retain enough weed killer so that further growth is inhibited for quite some time.

Other chemical solutions you can use include copper sulfate – 5 ounces to 1 gallon of water, copper nitrate, formaldehyde (49 parts of water to 1 part formaldehyde), or sodium hypochlorite (laundry bleach). Just boiling water can be used as well.

For best results, seal the surface after brushing off any dead moss and dirt. There are various transparent sealers or paints that are available commercially for this kind of application. An effective sealer might contain a 1% ammonium chloride as the coagulator and a 33% sodium silicate within water. The sealer allows you to easily wash off growth but does not prevent it from forming. Other sealers can also be helpful, including zinc fluosilicate in 1-gallon of water or 7 ounces of magnesium fluosilicate.

Oil Stains

The simple methods below can be used to remove oil stains effectively from parking lots and driveways.

Method 1: Use paint thinner or mineral spirits to saturate the area. Cover using an absorbent material like corn starch, corn meal, Fuller’s earth, cat litter, talc, or dry Portland cement. Allow it to stand overnight and then sweep the covering away. Repeat if needed.

Method 2: If an oil stain is not removed by Method 1 scrub using a trisodium phosphate solution.

Method 3: Use a laundry bleach to bleach the surface.

Graffiti

There are many commercial products that are well-suited for removing felt tip marketing and spray-paint off of concrete surfaces. Usually, the products are also effects for removing lipstick, chalk, and crayon. Always follow the manufacturer’s directions. If you do not obtain satisfactory results with your first application, you should make a second or third attempt using other products. The same product might not remove both felt tip stains and spray paint.


workers cleaning graffiti from concrete walls


You can use methylene chloride if there are not proprietary cleaners available. Wear protective clothing and brush methylene chloride on the surface. Allow it to sit for two minutes and rinse using water as you continuously brush. Hydrogen peroxide or oxalic acid may be used for helping to bleach some pigment out of the concrete pours. Other helpful solutions for removing graffiti include methyl ethyl ketone, xylene, or sodium hydroxide. Other effective cleanings can be done with sandblasting and water blasting.

After removing the graffiti, or before placing the structure back in service preferably, you should apply an anti-graffiti sealer or coating. Treating the surface should help to prevent graffiti from penetrating into the concrete’s pores and help to facilitate removing graffiti, hopeful without taking away the surface treatment.

Aliphatic urethanes are thought to be the best anti-graffiti coatings due to their resistance to abrasion, yellowing, and solvents. Solvents like methyl ethyl ketone and mineral spirits can remove a majority of graffiti off of aliphatic polyurethane without the urethane coating being compromised. Siloxanes, silanes, epoxies, and acrylics can be used as well to make it easier to remove graffiti. Epoxies tend to discolor or yellow and acrylics dissolve with solvent. Siloxanes and silanes might not resist some graffiti material or urethane. However, they resist graffiti penetrating into the concrete and maintain high breathability on the surface of the concrete.

Miscellaneous Stains

There are stains that vary in intensity from brown to light yellow that can occur sometimes on terrazzo floors and interior concrete due to subsequent cleaning or the original finishing. Usually, it is not difficult to remove these discolorations. It is possible to bring back the surface to its original appearance when you apply a poultice containing Javelle water (sodium hypochlorite solution) or using Javelle water to scrub the surface.

Other stains not discussed here can be removed by trying out various solvents or bleaches in an inconspicuous area. You should always thoroughly scrub the treated area using clear water following your treatment so that there are no removing agent traces remaining.

Coloured Concrete

You can protect coloured concrete using the following tips for easy care.

Concrete Sealers

These help to protect concrete against damage from freeze-thaw cycles and de-icing agents, while also repelling water, grease, oil, and repelling oil stains. Use a quality sealer to seal the concrete. It is critical that the sealer is applied during the first after placing the concrete and before the first frost occurs. Schedule a regular resealing program to take place every one or two years.

Cleaning

In order to prevent dirt from gradually accumulating, get periodic cleaning schedule. the most effective cleaning method for coloured concrete is low pressure, chemical-free power washing.

Removing Ice and Snow

– Do not chip ice on concrete surfaces
– Avoid using de-icing salts
– Use a plastic snow shovel to remove ice and snow

concrete highways

Concrete Finishes and Colour

As one of the world’s strongest, most durable and versatile construction materials, concrete is used in one form or another in every major construction project from bridges and tunnels to offices and schools.

Builders, engineers, and architects are constantly finding new ways to use concrete. Ready-Mix concrete, for example, is made from a precisely balanced mixture of aggregates, water, and cement from which an incredible variety of cement-based forms can be created.

Over the years concrete has found its way into almost every aspect of modern society from playgrounds to professional sports arenas, residential homes to high-rise buildings, airport runways to mass transit stations, and car parks to high-speed highways.

self-compacting-concrete

Concrete Finishes

Concrete can be made to look like expensive building materials such as wood or slate. The finishing skills of a concrete finishing team can turn a drab concrete slab into a work of art. For example, by adding special details, large expanses of concrete can be visually scaled down.

Colour Finishes

By mixing pigments into the concrete it can be produced in a variety of interesting colors that become an integral part of the material.

Colour Cautions

Because colour in a specific mix design may vary slightly from load to load,

we recommend that the following additional steps are taken in the preparation stages:

Consistency
The use of a super-plasticizer is recommended if a higher slump is required.
Special Care
Special care must be taken with the addition of water.
Planning
To minimize color discrepancies it is important to plan exactly where one load will end and another one will begin.
Additives
Only non-chloride accelerators should be used as calcium chloride could dramatically change the colour of concrete.
Curing
As with normal concrete, coloured concrete should be allowed to cure for 3 to 7 days. Temperature, age, the consistency of sub-grades and forms, and the type of concrete at the time of pouring will also affect the colour.
Sealing
Once the concrete has matured to allow the moisture content to be reduced, sealers should be applied to prevent mottling.

Pouring Coloured Concrete …

Patterns and Textures

Special tools can be used to pattern-stamp concrete to make it look like slate, brick, cobblestone, tile, or other types of textured surfaces. Traditional concrete can be given an exposed aggregate finish for a more natural look. An exposed aggregate look can be achieved by washing away surface mortar just before the concrete starts to harden.

concrete-pump

Concrete Curing Process

Concrete Curing

The concrete curing process is essential to the long-term durability of the concrete. For the initial seven days after it has been placed, concrete needs to be kept as moist as possible. It also needs to be given enough drying time before it is subjected to de-icing salts or freezing temperatures.

truck pouring mixed concrete floor

Properly curing concrete requires the proper control of temperature and moisture. If concrete is not properly cured, it might only achieve half of its total potential design strength.

There are two major facts that show why a seven-day curing period is a good idea:

Cement, which is the active ingredient contained in concrete, needs moisture on a constant basis in order to increase its strength

When concrete is kept moist for seven days, it will gain strength and also produce fewer cracks and shrink less

There are several ways to assist the curing process:

Leave the forms in place
Use coverings like insulating blankets, polyethylene, wet burlap, or similar materials
Spray a mist or pond water over the concrete
Spray-on sealers and liquid curing agents

The most convenient and effective method is to use a liquid curing agent. You should apply this curing agent right after the finishing process is complete. When a curing agent is used, a membrane forms on the concrete’s surface to retain moisture. After applying the curing agent, no further work needs to be done to the concrete. Curing agents are applied using a roller or sprayer.

CSA A23.1 states that curing is a required part of the concrete construction process and that moisture is required in order to maintain concrete at a minimum 10°C temperature and 100% relative humidity for 3 days at least. For durability requirements of S1, S2, C1, C2, and F1 exposure classes, the period is extended out to 7 days minimum.

Curing In Cold Weather

It is also possible to safely place concrete during the colder months as long as the proper precautions are taken. The mix during colder weather should be adapted to the current ambient temperature by providing protection, adding accelerators, and heating the concrete.

Heat is generated by concrete during hydration, which is the chemical process that takes place when cement reacts with water in order to form a stable and hard paste. The hydration process is affected by the mix design, concrete dimensions, ambient air temperature, and the initial concrete temperature. The concrete’s temperature during placement and after is critical due to the fact that as the temperature goes down concrete sets at a slower rate. Finishing and removal of the forms might be delayed when the weather is cool. To maintain the development of strength, the proper precautions need to be taken.

Concrete should not be placed in freezing weather, snow, or on frozen ground. If concrete freezes when it is in a saturated condition, then surface problems may arise such as cracking, spalling or scaling due to frozen water expanding and contracting inside of the concrete. In freezing weather conditions, water curing of the concrete should be stopped 12 hours before the protection period ends. A curing agent should not be used if there is a chance that the concrete might freeze at any time during the curing process.

Concrete should be protected against freezing temperatures for 3-7 days after it is placed.

Leave the forms in place for as long as possible. The edges and corners are the most vulnerable (heat and cover if necessary).

Cover and heat flatwork to protect it or cover with straw and plastic or use insulated blankets.